แสดงบทความที่มีป้ายกำกับ root แสดงบทความทั้งหมด

Root user Only!!!
ก่อนอื่นต้องมี
- มือถือ Samsung Galaxy Mini ที่ รูทแล้ว (อันนี้แน่นอนไม่มีจะทำได้ไง 555)
- Root Explorer คลิกครับ
- flashplayer 11 คลิกครับ
วิธีลง
1.แตกไฟล์ที่โหลดออกมาครับ

2. ลง flashplayer ครับ
3.เข้า root Explorer แล้ว copy ไฟล์นามสกุล .so ทั้ง4ไฟล์ไปไว้ที่ /data/data/com.adobe.flashplayer/lib

4. เปลี่ยน permission โดยกดที่ไฟล์ .so มาประมาณ 2 วิ เลือก Permission

6. ทำให้ครบทุกอันครับ
ตอนนี้น้องมินิก็เล่น flash ได้แล้วครับ
เครดิต ต้นฉบับไฟล์+วิธีลงบางส่วนครับ(เกื่อบทุึกส่วน อิอิ)
http://www.thaiandroidphone.com/thread-24161-1-1.html

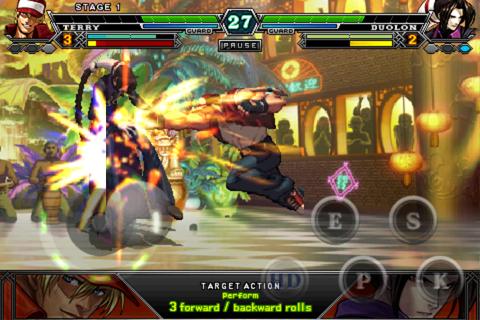
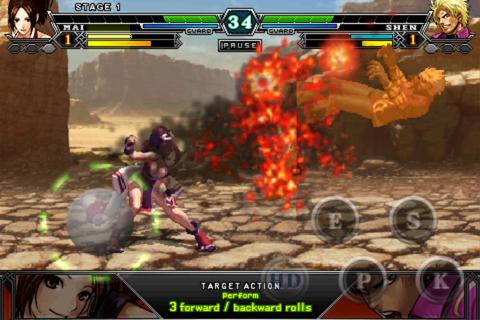
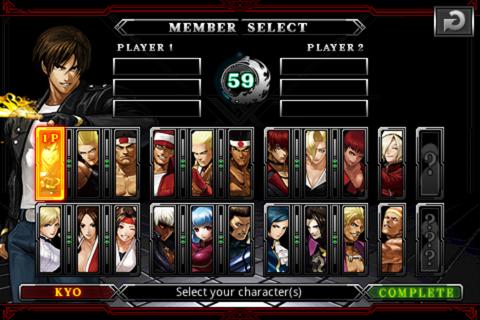
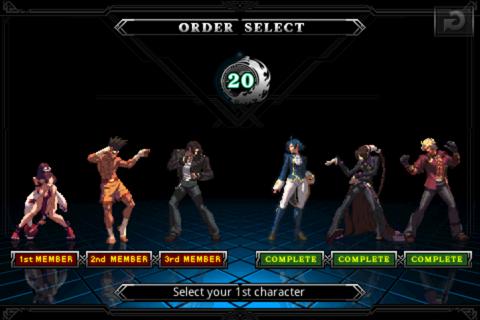
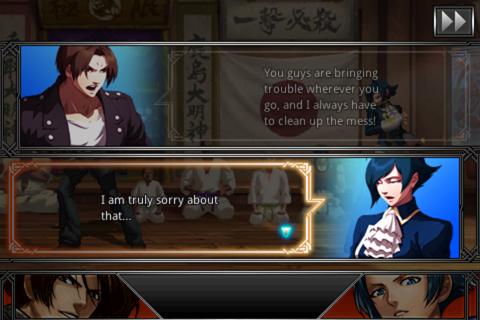
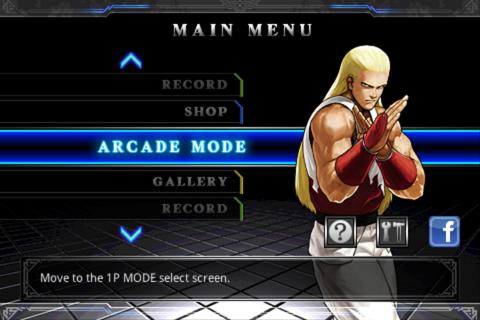
Enjoy the complete KOF experience on your Android devices!
GAME FEATURES
From art direction to gameplay, THE KING OF FIGHTERS Android brings the complete KOF experience to the Android platforms. The gorgeous graphics of the world-famous fighting series have been faithfully recreated, taking full advantage of the latest Android hardware. The use of the Virtual Pad/Joystick perfectly reproduces KOF’s controls, creating a simple, user-friendly play-style to easily perform special moves and combinations.
From art direction to gameplay, THE KING OF FIGHTERS Android brings the complete KOF experience to the Android platforms. The gorgeous graphics of the world-famous fighting series have been faithfully recreated, taking full advantage of the latest Android hardware. The use of the Virtual Pad/Joystick perfectly reproduces KOF’s controls, creating a simple, user-friendly play-style to easily perform special moves and combinations.
Download APK
วิธีลง
1.ติดตั้ง LUCK PATCH ก่อนครับ
2.ติดตั้ง APK แล้วห้ามกดเข้าเกมส์ก่อนนะครับ
3.เข้า LUCK PATCH แล้วหาแอป THE KING OF FIGHTERS เลือก Remove License Verification!
4.ต่อ wifi เข้าเกมส์ไปโหลดดาต้าต่อประมาณ 396 MB ครับ
5.เข้าเกมส์มันจะ Error ออกเกมส์ แล้วถอนการติดตั้ง LUCK PATCH
6. รีสตาทโทรศัพท์ แล้วเข้าเกมส์ไปมันส์เลยครับ
ขอบคุณคุณ ninewith ที่แนะนำเกมส์นี้มาครับ

Link2SD is an application that makes it easy for Android 1.6+ users with root privileges on their phone to move applications to the SD card.
The idea behind is same with apps2sd scripts, linking applications to SD card’s second partition but differs in two ways.
One, instead of linking /data/app folder (that means moving all applications), you can select applications that you want to move.
Two, it’s an application which means has a user interface. You can manage your applications with few clicks.
Two, it’s an application which means has a user interface. You can manage your applications with few clicks.
It also provides native apps2sd features on Android 2.2 and higher. It can move any non-protected user apps to SD card (force move), with batch moving capability.
That feature uses Android’s standard SD-card installation feature and does not require a second partition. It can break some apps if they are not meant to be moved to the SD card (Such as Widgets).
That feature uses Android’s standard SD-card installation feature and does not require a second partition. It can break some apps if they are not meant to be moved to the SD card (Such as Widgets).
Features:
- Create and remove link for apk, dex and lib files of the applications you select
- Automatically link newly installed apps (optional)
- Move any user apps to SD even though the app does not support moving to SD (a.k.a. “force move”, for Android 2.2 and higher)
- Shows the apps that support moving to SD with native apps2sd (for Android 2.2 and higher)
- Set the default install location of the apps; auto, internal, or external (for Android 2.2 and higher)
- Batch link, unlink, reinstall, uninstall, “move to SD”, “move to phone” functions (multi-select mode)
- Uninstall system applications (bloatware removal)
- Freeze and un-freeze system and users applications
- Convert system apps into user apps
- Convert user apps into system apps
- Integrate “Updated” system apps into system (ROM)
- Clear data and cache of the application
- Clear all apps cache at once (1-tap cache cleaner without being root)
- List applications, show detailed size information and link status
- Sort and filter applications
- Search applications by name
- Display available space information of internal storage, SD card and SD card 2nd partition
- Create and remove link for apk, dex and lib files of the applications you select
- Automatically link newly installed apps (optional)
- Move any user apps to SD even though the app does not support moving to SD (a.k.a. “force move”, for Android 2.2 and higher)
- Shows the apps that support moving to SD with native apps2sd (for Android 2.2 and higher)
- Set the default install location of the apps; auto, internal, or external (for Android 2.2 and higher)
- Batch link, unlink, reinstall, uninstall, “move to SD”, “move to phone” functions (multi-select mode)
- Uninstall system applications (bloatware removal)
- Freeze and un-freeze system and users applications
- Convert system apps into user apps
- Convert user apps into system apps
- Integrate “Updated” system apps into system (ROM)
- Clear data and cache of the application
- Clear all apps cache at once (1-tap cache cleaner without being root)
- List applications, show detailed size information and link status
- Sort and filter applications
- Search applications by name
- Display available space information of internal storage, SD card and SD card 2nd partition
What you need:
- root permission.
- a second partition on your SD card.
- root permission.
- a second partition on your SD card.
You should have two partitions on SD card and both should be primary.
The first FAT partition is your standard SD card storage. The second partition is used for application files and can be ext2, ext3, ext4 or FAT32.
Some phones lack the ext2, ext3 or ext4 file system support and you may get mount errors like “no such device”, “invalid argument”. These phones need ext2.ko or ext3.ko modules and even some additional modules to be able to mount. Using FAT32 on the second partition will eleminate such problems, because FAT32 is supported on all phones.
The first FAT partition is your standard SD card storage. The second partition is used for application files and can be ext2, ext3, ext4 or FAT32.
Some phones lack the ext2, ext3 or ext4 file system support and you may get mount errors like “no such device”, “invalid argument”. These phones need ext2.ko or ext3.ko modules and even some additional modules to be able to mount. Using FAT32 on the second partition will eleminate such problems, because FAT32 is supported on all phones.
Link2SD does not create the second partition, you need to create it yourself. You can use any partition manager such as Minitool, Paragon, Easeus etc. for this.
How it works:
Link2SD mounts the second partition of your SD card and makes OS mounts it at boot time.
Link2SD mounts the second partition of your SD card and makes OS mounts it at boot time.
When you press “Create Link” button Link2SD moves apk file, dalvik-cache (.dex) file and lib files (.so) to SD card’s 2nd partition and creates symbolic links in original directories.
Note: On Android 1.6 and 2.1, shortcut and the widget of the app should be re-added to homescreen if you move the apk file.
You can remove the links and put application files back to phone. Just click on “Remove Link” button.
Some points
- System applications should not be linked to SD card. Link2SD does not allow these applications to be linked.
- When you connect your phone to PC as mass storage, Android unmounts the first FAT partition but the second partition remains mounted. Therefore linked applications are not affected and can be run without problems.
- Link2SD does not move application’s private data files; it moves apk, dex (dalvik-cache) and lib files.
- System applications should not be linked to SD card. Link2SD does not allow these applications to be linked.
- When you connect your phone to PC as mass storage, Android unmounts the first FAT partition but the second partition remains mounted. Therefore linked applications are not affected and can be run without problems.
- Link2SD does not move application’s private data files; it moves apk, dex (dalvik-cache) and lib files.
DISCLAIMER: It is made available for use at your own risk with no warranty of any kind.
DOWNLOAD คลิก
จากการลองนะครับพบว่าย้ายได้เยอะมากแถมสามารถใช้ลบโปรแกรมที่มากับเครื่องได้ด้วย


six guns เกมส์คาวบอยโครตสนุกบนมินิมาแล้ว [ต้อง root ครับ][working on all armv6 phone galaxy mini,y,fit]

Discover a wilder West than you ever imagined. Play for free, make the enemy pay
Explore a truly enormous and open Wild West frontier full of cowboys, bandits and more…unnatural enemies in this third person shooter adventure game.
Play for free: Make your enemies pay!
Buck Crosshaw never shot a man who didn’t deserve it, but now he’s an outlaw who had to fake his own death and escape to Arizona. But in escaping one evil, Buck is about to face another, for an ancient and wicked force stirs in the hills of this mysterious region.
A WILD FRONTIER
Freely explore an open world set in Arizona and Oregon full of events, mystery and challenges for you to discover as you become completely immersed in the story and the action. But don’t be fooled by this land’s beauty - outlaws, vampires & many other unnatural foes lurk in every shadow.
Freely explore an open world set in Arizona and Oregon full of events, mystery and challenges for you to discover as you become completely immersed in the story and the action. But don’t be fooled by this land’s beauty - outlaws, vampires & many other unnatural foes lurk in every shadow.
ACCEPT THE CHALLENGE
Take on 40 missions with a great variety of tasks for you to overcome. You’ll race horses, take out robbers, fend off waves of enemies and more along the way!
Take on 40 missions with a great variety of tasks for you to overcome. You’ll race horses, take out robbers, fend off waves of enemies and more along the way!
SADDLE UP
In this kill-or-be-killed land, you’ll need to unlock all 8 different horses, 19 weapons and a wide selection of clothes, ammo and other items to help you on your adventure.
In this kill-or-be-killed land, you’ll need to unlock all 8 different horses, 19 weapons and a wide selection of clothes, ammo and other items to help you on your adventure.
PLAY FOR FREE
Free games have never been this deep or fun! It costs you nothing to download and play the game to the end!
Free games have never been this deep or fun! It costs you nothing to download and play the game to the end!
For fans of FPS, action games, shooting games, action games free Android games.
วิธีลงค่อนข่างยุ่งยากนิดนึงนะครับ แต่รับประกันความสนุกของเกมส์นี้ครับ
ก่อนอื่นโหลด apk และ data กันก่อนครับ
วิธีลง
1.แตกไฟล์ดาต้าแล้วเอาไปไว้ที่ SDCard/Gameloft/Games/
ถ้ามันถามขอใช้สิทธิ super user ให้เลือก Allow
3.หาและก็อปไฟล์ apk (กดค้างที่ไำฟล์apkแล้วเลือก copy)

4.กดที่ปุ่ม Favorites แล้วเลือก /

5.เลื่อนลงมาหาโฟรเดอร์ system

6.เลื่อนลงมาเลือกโฟรเดอร์ app และ วางไฟล์ apk ไว้ในโฟรเดอร์นั้น
7.ออกจากโฟร์เดอร์ app มาที่โฟร์เดอร์ system

7.ออกจากโฟร์เดอร์ app มาที่โฟร์เดอร์ system
8.เลื่อนลงมาเลือกที่ไฟล์ build.prop อันแรก แล้วเลือก edit
9.แก้ตามนี้
หาบรรทัดที่เขียนว่า ro.product.model=(ชื่อรุ่นโทรศัพท์คุณ) แก้เป็น ro.product.model=LG-P500
10.รีสตาทโทรศัพท์จะเห็นว่าเกมส์จะถูกติดตั้งแล้ว
11.เข้าเกมส์มันจะให้โหลดดาต้าต่ออีก 3MB ให้ต่อ wifi แล้วโหลดให้ครบ
เรียบร้อยครับเข้าเกมส์ไปมันส์ได้เลย
สำหรับใครที่บ้านไม่มี wifi เรามีทางแก้
1. โหลดเจ้านี่ ไปใส่ไว้นอกสุดของsdcard (ไม่ต้องใส่โฟร์เดอร์อะไรทั้งนั้น)
2. เปิดเน็ตซิมแล้วเข้าเกมส์ มันจะถามให้โหลดอีก 3MB ให้กดที่ carrier network
3.รอโหลดให้เสร็จ (ช้าหน่อยเน็ตซิมมันช้า)
เรียบร้อยเข้าเกมส์ได้เลย


Your friendly neighborhood Spider-Man battles to save his beloved city! Spider-Man will need to use all of his great powers to save New York from the worst breakout of Super Villains the city has ever seen. Fight against time to stop the madness and mayhem created by the Super Villains who want to take over the city and disperse a poisonous virus! Spider-Man: Total Mayhem captures all the action, humor and fun of the Ultimate series in state-of-the-art gameplay and animations. Are you up for the challenge?
download
เปิด Chainfire 3D หากไม่มีโหลดที่นี่
เข้า chainfire เลือกที่ Default OpenGL settings

เลื่อนลงมาเลือกที่ Use plugin

เปลี่ยนปลักอินเป็น navidia

ติดตั้งเกมส์ เสร็จแล้ว ต่อ WIFI แล้วเข้าเกมส์
รอโหลดดาต้าจากตัวเกมส์ให้เสร็จ (ประมาณ 340 mb)
เข้าเกมส์ไปสนุกเลย
วิธีแก้กระตุก
เข้าตั้งค่าในเกมส์แล้วปิดเสียงในเกมส์ซะ เกมส์ก็จะกระุตุกน้อยลงมาก ลองแล้วใน galaxy mini
วีดิโอที่เล่นใน galaxy mini ของผม+วิธีแก้กระตุกเพิ่มเติมในวีดิโอ
วีดิโอที่เล่นใน galaxy mini ของผม+วิธีแก้กระตุกเพิ่มเติมในวีดิโอ


Chainfire 3D เป็น app ที่ติดตั้งปลั๊กอินสำหรับเครื่องที่ไม่ได้ใช้ชิป Nividia, PowerVR,Qualcomm ให้ใช้งานเกมส์ และแอพลิเคชัน ที่ออกแบบมาสำหรับ Nividia, PowerVR,Qualcomm ได้
ขั้นตอนการติดตั้ง 3D Chainfire
DOWNLOAD เจ้านี่ก่อน
- ให้ทำการติดตั้ง 3D Chainfire 3.3
- นำ libGLEMU NVIDIA.zip libGLEMU POWERVR.zip libGLEMU QUALCOMM.zip ทั้ง 3ไฟล์ เก็บไว้ที่ SDcard นะครับ
- เปิด Chainfire3D. ขึ้นมา และกด Allow Superuser Request access ด้วยนะครับ
- กดที่ Install / upgrade / install CF3D driver เพื่อติดตั้ง ไดร์เวอร์ครับ
- เลือก Install CF3D driver and reboot
- เสร็จแล้วเครื่องจะรีสตาร์ท 1 ครั้ง
- หลังจากรีสตาร์ทแล้ว เปิด Chainfire3D เลื่อนไปที่ Install plugins / shaders
- รอจนมันสแกนหาไดเวอร์ 3 ไฟล์ที่เราใส่เข้าไปใน SDcard อาจจะช้าหน่อย ราวๆ 5 นาที (แล้วแต่ข้อมูลใน SD มากหรือน้อย)
- รอจนปลั๊กอินขึ้นมาทั้ง 3 ตัว แล้วก็กดติดตั้งไปทีละตัวๆ จนเสร็จ (ถ้ามันบอกว่า ให้กดฟังก์ชั่น fix market ก็อย่าลืมถอยไปกดนะครับ ในเมนูหลัก..)
- เป็นอันเสร็จเรียบร้อยการติดตั้ง…

PES2012 HD V.1.0.5 ตัวล่าสุ! อัพเดพซื้อขายนักเตะครบ2011-2012

เพิ่มลีกมา 1 ลีก Copa santander libertadores
APK http://www.mediafire.com/download.php?intjmqayn3t16tr
DATA http://www.2shared.com/file/lF44yzWv/PES-2012-Pro-Evolution-Soccer-.html
Lucky Patcher http://www.4shared.com/android/3Ivhcosm/Lucky_Patcher_v161.html
เอา data ไปไว้ที่ data/sdcard/andriod/obb
วิธีลง
1 โหลด data ไปไว้ตามที่บอกไว้ หากไม่มีโฟรเดอร์ obb ก็สร้างเองเลย
2 ติดตั้ง apk ติดตั้งแล้วห้ามเปิดเด็ดขาด
3 ติดดั้ง lucky patcher
4 จากนั้นเข้าแอป Lucky patcher
5 เลือก Remove License Verification!
6 เลือก Auto mode
เข้าเกมส์เลย
Root คืออะไร?


Root ในภาษาของคนใช้ Linux ทั่วไป มันคือ Default Super User นั่นเองครับ หลังจากเราลง Linux หรือญาติของ Linux ตัวอื่นๆอย่าง Ubuntu, FreeBSD และ Fedora มันจะมี User ที่ขื่อว่า Root เป็น Super User ที่สามารถแก้ไขไฟล์และตั้งค่าระบบต่างๆในเครื่องได้ ถ้าจะพูดกันให้เข้าใจแบบบ้านๆกับคนใช้ Windows บ่อยๆ Super User ก็คือ Adminstrator นั่นล่ะครับ
ให้เข้าใจง่ายๆ Root บน Android เป็นภาษาไทยว่า "การทำให้ได้มาซึ่งสิทธิ Super User"
Root แล้วได้อะไร?
มีหลายๆคนมักจะเข้าใจผิดกันไปต่างๆนาๆว่า
Root แล้วเครื่องจะเร็วขึ้น
Root แล้วเครื่องจะเสถียรขึ้น
Root แล้วเครื่องจะประหยัดแบตขึ้น
ต้องบอกว่านั่นไม่ใช่สิ่งที่ได้มาจากการ Root ครับ แต่มันจะได้มาหลังจากการ Root ต่างหากล่ะครับ บางคนอาจจะคิดง่ายๆว่าอยาก Overclock CPU ก็ Root แล้วลงแอพฯ Overclock ก็จบแล้ว จริงๆมันไม่ใช่ครับ บางเครื่องอาจจะง่ายๆแค่นั้น บางเครื่องก็ถึงกับต้องลง Custom ROM หรือยัด Kernel ที่ Support การ Overclock ลงไป ถึงจะสามารถ Overclock ได้ เพราะฉะนั้นถ้าหากเราต้องการจะใช้อะไรหลังจากการ Root ให้ไปดูวิธีทำไว้ก่อนว่ามันยากเกินกว่าเราจะทำได้มั้ย หรือมันสามารถทำได้รึเปล่า เพราะเครื่องบางเครื่องมันก็ Overclock ไม่ได้นะครับ
เรื่องที่ทำให้เครื่องเสถียรขึ้นก็เช่นกัน การที่ทาง Google จำเป็นต้องปิด Super user ไว้ไม่ให้เราใช้กันก็เพราะมันจะมีผลกับความเสถียรของเครื่องที่เราใช้อยู่นี่ล่ะครับ ถ้าหากเรามี Super user อยู่ในมือเราก็สามารถแก้ไขตัวระบบได้ แน่นอนว่ามันอาจจะทำให้เครื่องเสถียรขึ้นหรือลดความเสถียรลงก็ได้ เพราะฉะนั้นก่อนการ Root ทำใจเรื่องนี้กันไว้ด้วยนะครับ
Root แล้วเครื่องจะเร็วขึ้น
Root แล้วเครื่องจะเสถียรขึ้น
Root แล้วเครื่องจะประหยัดแบตขึ้น
ต้องบอกว่านั่นไม่ใช่สิ่งที่ได้มาจากการ Root ครับ แต่มันจะได้มาหลังจากการ Root ต่างหากล่ะครับ บางคนอาจจะคิดง่ายๆว่าอยาก Overclock CPU ก็ Root แล้วลงแอพฯ Overclock ก็จบแล้ว จริงๆมันไม่ใช่ครับ บางเครื่องอาจจะง่ายๆแค่นั้น บางเครื่องก็ถึงกับต้องลง Custom ROM หรือยัด Kernel ที่ Support การ Overclock ลงไป ถึงจะสามารถ Overclock ได้ เพราะฉะนั้นถ้าหากเราต้องการจะใช้อะไรหลังจากการ Root ให้ไปดูวิธีทำไว้ก่อนว่ามันยากเกินกว่าเราจะทำได้มั้ย หรือมันสามารถทำได้รึเปล่า เพราะเครื่องบางเครื่องมันก็ Overclock ไม่ได้นะครับ
เรื่องที่ทำให้เครื่องเสถียรขึ้นก็เช่นกัน การที่ทาง Google จำเป็นต้องปิด Super user ไว้ไม่ให้เราใช้กันก็เพราะมันจะมีผลกับความเสถียรของเครื่องที่เราใช้อยู่นี่ล่ะครับ ถ้าหากเรามี Super user อยู่ในมือเราก็สามารถแก้ไขตัวระบบได้ แน่นอนว่ามันอาจจะทำให้เครื่องเสถียรขึ้นหรือลดความเสถียรลงก็ได้ เพราะฉะนั้นก่อนการ Root ทำใจเรื่องนี้กันไว้ด้วยนะครับ
ทำไมต้อง Root?
แน่นอนว่าเพื่อทำให้เราสามารถแก้ไขตัวระบบ และเพิ่มความสามารถให้กับตัวระบบของเราได้นั่นเองครับ ลองมาดูตัวอย่างฟังชั่นที่มีประโยชน์ที่เราได้มาหลังจากการ Root กันดีกว่า
- การแชร์ไฟล์แบบ NFS ( Network File Sharing ) ด้วย Samba File Sharing การแชร์ไฟล์ลักษณะนี้จะเหมือนกับการแชร์ไฟล์ระหว่าง Windows กับ Windows ผ่าน Wireless เลยล่ะครับ ซึ่งแอพฯตัวนี้เป็นเหตุผลหลักๆที่ผม Root เครื่องอยู่ทุกครั้งเลยทีเดียว ( ขี้เสียบสายสินะ แฮะๆ)
- การ Fake Legion บน Android Market อันนี้ผมเองก็ใช้บ่อยๆเหมือนกัน เนื่องจากแอพฯใน Market บางตัวนั้นจะล้อคเอาไว้สำหรับประเทศของตัวเองเท่านั้น ยกตัวอย่างเช่นประเทศญี่ปุ่นครับ แอพฯเค้าเยอะมาก แต่เราโหลดไม่ได้เพราะเค้าล้อคโซนเอาไว้ ก็ใช้พวก Market Enabler นี่ล่ะครับ Fake Legion ไปโหลดกัน
- Overclock CPU อันนี้เอาสะใจครับ เอาไว้ Overclock วัด Quadrant ให้มันดูเยอะเล่นๆไปงั้นเอง สำหรับคนใช้ Galaxy S2 หรืิอ Galaxy Note ที่ใช้ Stock ROM สามารถโหลด Tegrak Overclock มาใช้ได้เลย
- Droid Firewall เอาไว้บล้อคอินเตอร์เน็ตเป็นรายแอพฯไป อย่างเช่นผมเห็นว่า Whatsapp มันส่งข้อมูลบ่อยกินแบต หรืออยากจะออฟไลน์ Whatsapp ก็ใช้เจ้าตัวนี้ล่ะครับ
ที่ผมบอกไปด้านบนนี่คือที่ตัวผมเองใช้อยู่บ่อยๆนะครับ แต่จริงๆแล้วมันยังมีอะไรให้ทำอีกเยอะมาก ทั้งการเปลี่ยน Font, การเปลี่ยน Boot Animation, การเปลี่ยนรูปแบตเตอร์รี่ และเปลี่ยนไปใช้ Custom ROM เพื่อเพิ่มประสิทธิภาพและความสามารถของเครื่อง
- การแชร์ไฟล์แบบ NFS ( Network File Sharing ) ด้วย Samba File Sharing การแชร์ไฟล์ลักษณะนี้จะเหมือนกับการแชร์ไฟล์ระหว่าง Windows กับ Windows ผ่าน Wireless เลยล่ะครับ ซึ่งแอพฯตัวนี้เป็นเหตุผลหลักๆที่ผม Root เครื่องอยู่ทุกครั้งเลยทีเดียว ( ขี้เสียบสายสินะ แฮะๆ)
- การ Fake Legion บน Android Market อันนี้ผมเองก็ใช้บ่อยๆเหมือนกัน เนื่องจากแอพฯใน Market บางตัวนั้นจะล้อคเอาไว้สำหรับประเทศของตัวเองเท่านั้น ยกตัวอย่างเช่นประเทศญี่ปุ่นครับ แอพฯเค้าเยอะมาก แต่เราโหลดไม่ได้เพราะเค้าล้อคโซนเอาไว้ ก็ใช้พวก Market Enabler นี่ล่ะครับ Fake Legion ไปโหลดกัน
- Overclock CPU อันนี้เอาสะใจครับ เอาไว้ Overclock วัด Quadrant ให้มันดูเยอะเล่นๆไปงั้นเอง สำหรับคนใช้ Galaxy S2 หรืิอ Galaxy Note ที่ใช้ Stock ROM สามารถโหลด Tegrak Overclock มาใช้ได้เลย
- Droid Firewall เอาไว้บล้อคอินเตอร์เน็ตเป็นรายแอพฯไป อย่างเช่นผมเห็นว่า Whatsapp มันส่งข้อมูลบ่อยกินแบต หรืออยากจะออฟไลน์ Whatsapp ก็ใช้เจ้าตัวนี้ล่ะครับ
ที่ผมบอกไปด้านบนนี่คือที่ตัวผมเองใช้อยู่บ่อยๆนะครับ แต่จริงๆแล้วมันยังมีอะไรให้ทำอีกเยอะมาก ทั้งการเปลี่ยน Font, การเปลี่ยน Boot Animation, การเปลี่ยนรูปแบตเตอร์รี่ และเปลี่ยนไปใช้ Custom ROM เพื่อเพิ่มประสิทธิภาพและความสามารถของเครื่อง
ทั้งนี้การ Root อย่างไรก็ยังมีผลเสียอยู่ เช่น ประกันหมด (เอากลับมาได้ด้วยการ Flash ROM ใหม่) ถ้าคิดจะ Root แล้วเจ้าของเครื่องก็ต้องรับความเสี่ยงกันเอาเองนะครับ
มาเริ่มการ Root น้อง มินิของเรากัน
ดูรุ่นน้องมินิกันก่อน
s5570
s5570B
วิธีROOT
(การเลือกเมนู ปุ่มเพิ่มเสียงคือเลื่อนขึ้น ปุ่มลดเสียงคือ เลื่อนลง ครับ ปุ่ม home ปุ่มกลางเครื่องเราคือ OK ปุ่ม power คือ ปุ่มเปิด-ปิดเครื่อง)
1.)วางไฟล์รูทที่sdcardนอกสุดไม่ต้องใส่โฟเดอร์อะไรทั้งนั้น
2.)ปิดเครื่องเข้ารีคัพเวอร์โหมดที่ home+power พร้อมกันค้างไว้พอขึ้นตัวหนังสือเหลืองๆแล้วปล่อยมือ
3.)เลือก applt updete from sdcard กดปุ่ม home แล้วหาไฟล์รูทที่เราใส่ไว้
4.)เลือกไพล์รูทที่เราใส่ไว้ใน sd card กดปุ่ม home
5.)แล้วกด reboot system now โดยกดปุ่ม Home
6.)จากนั้นเครื่องจะรีสตาร์ทใหม่ เปิดดูแอพในเครื่องจะมีแอพมาใหม่คือ แอพsuperuser แสดงว่าRootเรียบร้อยแล้วครับ
2.)ปิดเครื่องเข้ารีคัพเวอร์โหมดที่ home+power พร้อมกันค้างไว้พอขึ้นตัวหนังสือเหลืองๆแล้วปล่อยมือ
3.)เลือก applt updete from sdcard กดปุ่ม home แล้วหาไฟล์รูทที่เราใส่ไว้
4.)เลือกไพล์รูทที่เราใส่ไว้ใน sd card กดปุ่ม home
5.)แล้วกด reboot system now โดยกดปุ่ม Home
6.)จากนั้นเครื่องจะรีสตาร์ทใหม่ เปิดดูแอพในเครื่องจะมีแอพมาใหม่คือ แอพsuperuser แสดงว่าRootเรียบร้อยแล้วครับ
เครดิตข้อมูล
ีื
ัี
ัี

